Now that the I have shown the "wrong" way, I want to show the "correct" way. To begin with, I have setup a solution which contains:
- A console application that will
- Prompt the user for their first name
- Prompt the user for their last name
- Host a custom workflow (referred to as "MyWorkflow") that is responsible for greeting the user by their first and last name.
- A class library which contains:
- The custom workflow ("MyWorkflow")
- The custom activity (referred to as "MyActivity"), which will be responsible for greeting the user by their first and last name.

The next step is to add our custom activity ("MyActivity") to the custom workflow ("MyWorkflow") throw the visual designer. Then, we are ready to implement the properties which we wish to make visible to the runtime environment of our workflow ("MyWorkflow"). Essentially, we are going to define which properties we want to allow activity binding to be utilized. The properties of the activity that we want to expose for activity binding must be defined as
DependencyProperty items. In our example, I have created two
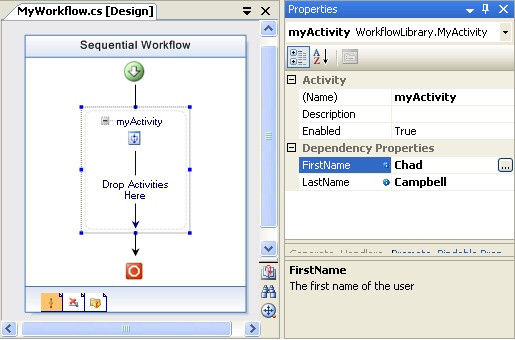
DependencyProperty items: FirstName and LastName. One thing you can immediately notice from the image displayed below is that these properties can be set through the visual designer. The FirstName and LastName properties are in the "Dependency Properties" category.
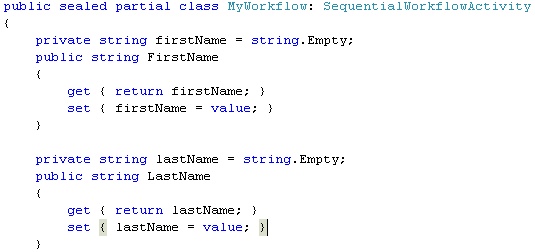
At this point, we have exposed the properties to the workflow. However, we need to expose our properties such that applications that interact with our workflow ("MyWorkflow") can set these properties. In order to do this, we need to make public properties available at the workflow level. These properties are going to be defined in the way that is typical within a .NET class. For the sake of clarity, the below image displays what I mean by this:
Now that we have created properties visible at the workflow level, we need to establish the binding between our custom workflow's property and our custom activity's property. The good news is, this is incredibly easy.
The first step is, within Visual Studio, select the activity within the workflow. Then select the property you wish to bind. You will notice ellipsis appear next to the property. You can see all of this in the image below. Notice the ellipses next to the "FirstName" property value.
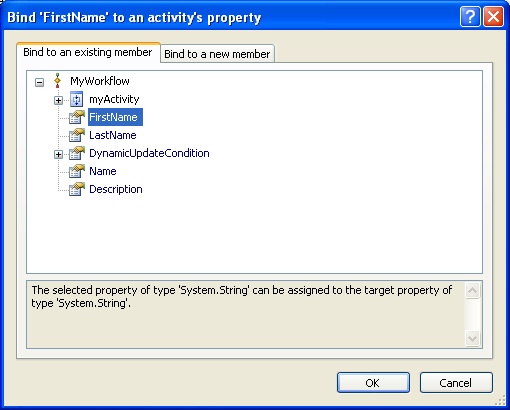
Next, you will select the ellipsis and a dialog will appear. This dialog is what will create the activity binding between our workflow property and our activity's property. Pretty slick eh? I was impressed. Below is a screen shot of the dialog you can expect.
After creating our binding, we are ready to see if it works. In order to test it, there are a couple of things we need to do in the case of our console application example.
First, We will override the "Execute" method within our custom activity to display the "Hello
Second, in order to pass the parameters from the console application to the workflow, we must utilize the
Dictionary object. The code below is the body of the "Main" method of the Program.cs file of our console application:
Console.Write("First Name: ");
string firstName = Console.ReadLine();

Console.Write("Last Name: ");
string lastName = Console.ReadLine();

Dictionary parameters = new Dictionary();
parameters.Add("FirstName", firstName);
parameters.Add("LastName", lastName);

using (WorkflowRuntime workflowRuntime = new WorkflowRuntime())
{
  // Run the workflow
  WorkflowInstance workflowInstance =
    workflowRuntime.CreateWorkflow(typeof(MyWorkflow), parameters);
  Console.WriteLine("Beginning workflow...");
  workflowInstance.Start();
}
And that's it! Our resulting output looks like the following:

I hope this walk-through of implementing Activity Binding was helpful. You can download the code here.
 Subscribe
No comments:
Post a Comment